Is your office chair slowly sinking on its own, impossible to keep at the right height? You don't have to throw it away. In the vast majority of cases, all it takes is replacing the gas cylinder on your office chair to give it a new lease on life — and for just a few dollars. This guide explains step by step how to identify a faulty cylinder, choose the right replacement part, and carry out the office chair piston replacement without calling a technician.
In France, 250,000 tonnes of office furniture are discarded every year, often due to simple, repairable mechanical problems. Repairing rather than replacing is both economical and environmentally responsible.
What Is a Gas Cylinder on an Office Chair?
The gas cylinder — also called a pneumatic cylinder or gas spring — is the central component of your chair's height adjustment system. It is a steel cylinder that uses the pressure of an inert gas (nitrogen) to allow vertical adjustment of the seat. Contrary to what one might think, it does not contain ordinary air, but a gas that ensures constant, smooth pressure.
Its operation is simple: when you activate the lever located under the seat, a valve opens and allows the gas to flow, raising or lowering the seat. When you release the lever, the valve closes and the position is held.
The quality of the components — the outer steel cylinder, the internal piston, the seals, and the control valve — directly determines the lifespan of the cylinder. Under normal use, an office chair hydraulic cylinder typically lasts between 3 and 8 years, depending on intensity of use and whether the maximum load is respected.
For more information on workstation ergonomics, check out our article on workstation ergonomics.
How to Tell If Your Office Chair Cylinder Needs Replacing
Several symptoms indicate it is time to proceed with pneumatic cylinder replacement:
The most common sign: your chair slowly sinks on its own, even without activating the lever. This happens because the seals deteriorate progressively with use, causing a gas leak.
Here are the other warning signs to watch for:
- The seat no longer holds the set height and sinks while you work
- You can no longer adjust the seat height despite operating the lever
- Creaking noises occur when you sit down or change position
- The suspension no longer has any effect; the seat lacks flexibility
- The adjustment lever is unresponsive or needs to be activated several times
- Oil is visible on the floor under the chair — a sign of an advanced leak
If you notice several of these symptoms, there is no need to wait: the gas cylinder tutorial below will guide you through resolving the problem quickly. You can also take a look at our guide on repairing an office chair that creaks or sinks for related issues.
What Tools to Prepare Before You Start
The good news is that office chair repair does not require professional equipment. Here is what you will need:
- A rubber mallet (essential for dislodging the cylinder without damaging the parts)
- A penetrating lubricant such as WD-40 (useful if the cylinder is seized after several years of use)
- A screwdriver if the cylinder is screwed to the seat mechanism
- An adjustable wrench for some models where the rod is screwed under the seat
- A thick cloth to protect surfaces if you use a regular hammer
- A sheet or blanket to place the upturned chair on the floor
How to Replace Your Office Chair Cylinder: Step-by-Step Tutorial
Step 1: Prepare Your Workspace
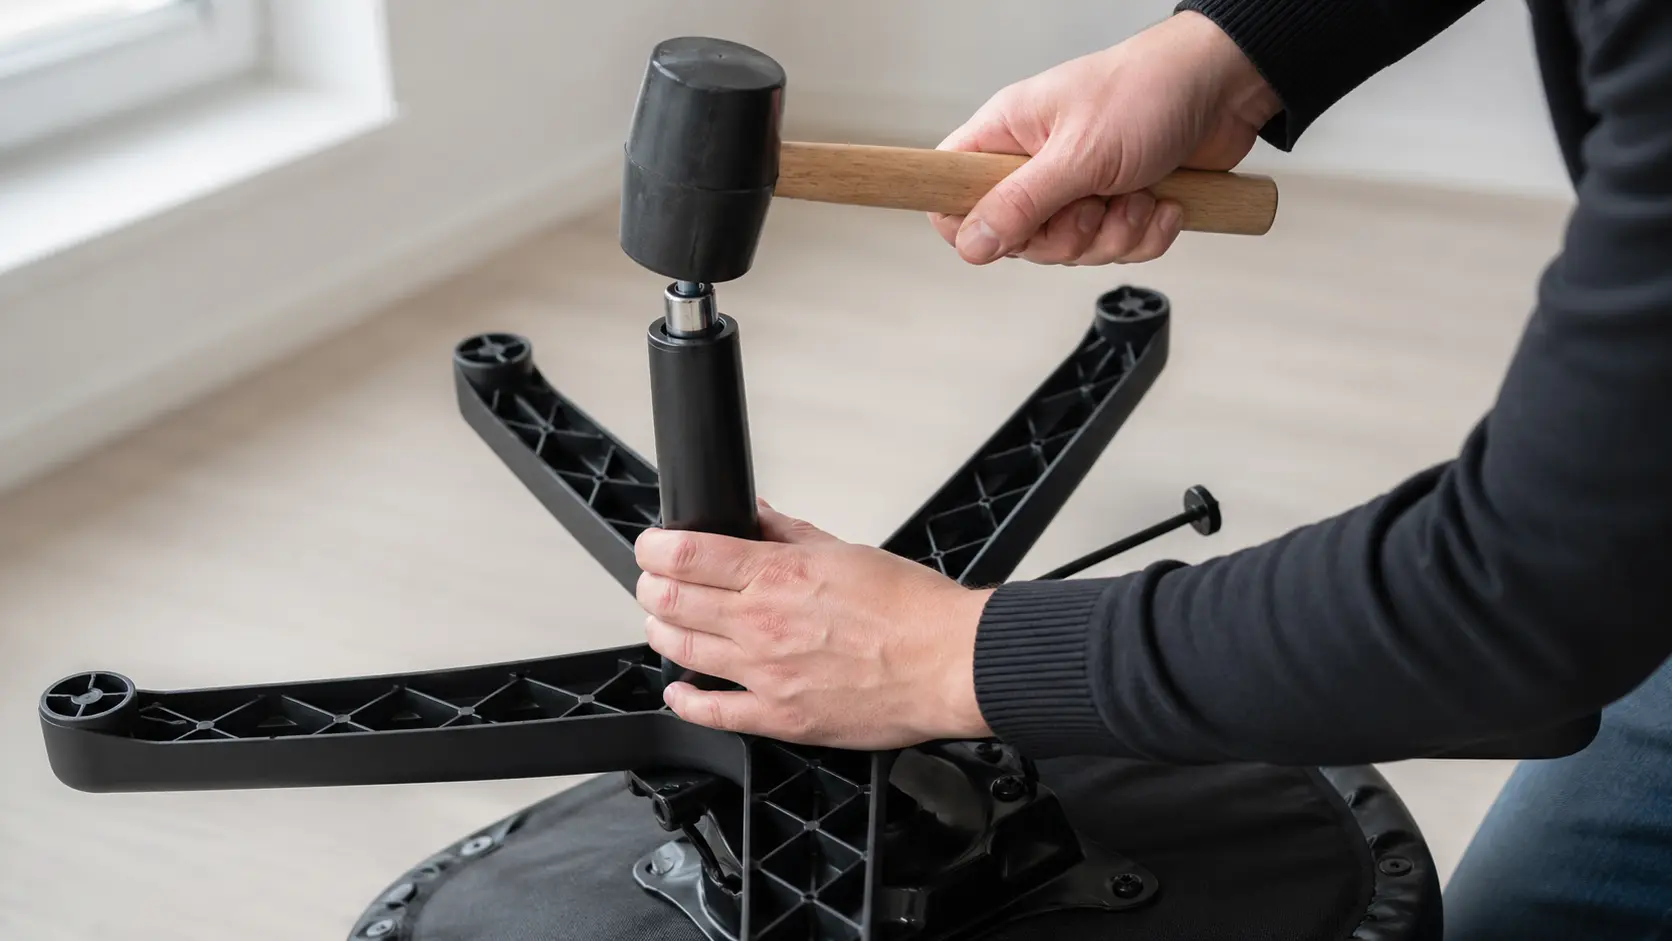
Place the chair upside down on a clean surface, ideally on a sheet to avoid scratching the floor and getting parts dirty. The star base and cylinder should face upward to allow easy access.
Step 2: Remove the Cylinder from the Seat
Two methods are possible depending on how resistant the mechanism is:
Method 1 (most common): hold the cylinder with one hand and strike the underside of the seat with the rubber mallet, around the rod, until it comes free. If the assembly is seized, apply WD-40 to the contact area between the cylinder and the seat plate, wait a few minutes, then try again.
Method 2: lift the chair slightly by the seat with both hands and shake it vigorously until the cylinder detaches. Be careful not to let the base fall on your feet.
Tip: if your chair has armrests, unscrew them first (4 screws under the seat) to make handling easier and avoid damaging them.
Step 3: Remove the Cylinder from the Star Base
Once detached from the seat, hold the star base and strike the end of the cylinder with the mallet until it comes completely free. The gas cylinder is not screwed in — it is simply press-fitted into the base, which explains the resistance.
Take advantage of this step to thoroughly clean the base and the seat mechanism — hard-to-reach areas accumulate dust and residue that could dirty the new cylinder.
Step 4: Choose and Install the New Cylinder
Before purchasing a replacement cylinder, check the dimensions of the old one:
- Total length of the cylinder (generally between 22 and 68 cm depending on the model)
- Diameter of the upper section (often 28 mm)
- Diameter of the base (usually 47 to 50 mm)
- Diameter of the insertion head (often 10 mm)
Photograph the cylinder from several angles before ordering. References are sometimes engraved on the cylinder. Note that there are 3 standard heights adapted to your desk height:
- Low cylinder: for desks between 65 and 75 cm high
- Intermediate cylinder: for desks between 75 and 90 cm
- High cylinder: for desks between 90 and 110 cm
Universal cylinders cover more than 95% of standard office chairs, which greatly simplifies replacement.
For installation, the process is the reverse:
- Remove the protective cap from the new cylinder
- Insert it vertically into the opening of the star base — it should hold firmly without moving
- Then press the seat down from above onto the cylinder rod
- Check stability before turning the chair back upright
Step 5: Test and Adjust Your Chair
Put the chair back in its normal position and test the height adjustment using the lever. The up and down movement should be smooth, and the position should hold without sinking. If everything works correctly, adjust your seat to adopt an ergonomic working position suited to your body.
How Much Does It Cost to Replace an Office Chair Cylinder?
The cylinder itself generally costs between $10 and $30 for a standard model. Reinforced cylinders for intensive use or for heavier users are slightly more expensive, but remain well below the cost of a new chair.
Labour costs, if you use a service provider, can add $30 to $60. By following this gas cylinder tutorial, you save that amount since the operation takes less than 15 minutes once you have the materials.
For comparison, an entry-level ergonomic office chair costs on average between $150 and $400. Repairing rather than replacing therefore represents substantial savings, especially since second-hand office furniture can be offered at a 30 to 50% discount compared to new.
How to Extend the Life of Your New Cylinder
Once the office chair piston replacement is complete, a few simple steps will help optimise the longevity of the mechanism:
- Regularly clean the rod of the cylinder with a damp cloth to prevent dust build-up, which damages the seals
- Operate the adjustment lever once a week even if you are not changing position — this keeps the internal seals supple
- Respect the maximum load indicated by the manufacturer: constant overloading accelerates premature wear
- Avoid aggressive chemical products that could alter the materials of the cylinder
If your office chair shows other signs of wear (flat seat, damaged casters, faulty armrests), it may be time to consider a full replacement. Consult our complete guide to choosing the best office chair to help with your decision.
FAQ: Replacing an Office Chair Cylinder
Can an office chair cylinder be repaired without replacing it?
In almost all cases, no. Once the seals have deteriorated and the gas is leaking, the cylinder cannot be reliably recharged or repaired. Full replacement is the only lasting solution, and it remains very affordable.
How do I know what size cylinder to choose for my chair?
First disassemble the old cylinder and measure its total length, as well as the diameters of the upper section and the base. Photograph it from different angles. Most universal cylinders are compatible with more than 95% of standard chairs, but it is better to check before buying.
How long does a replacement cylinder last?
With normal use and by respecting the maximum load, a quality replacement cylinder can last between 5 and 12 years. The duration varies depending on the intensity of use and regular maintenance of the mechanism.
My new cylinder is already sinking on its own — is that normal?
No, it is not normal. If a new cylinder is already showing sinking problems, first check that it is correctly fitted into the base and the seat. If the problem persists, the cylinder may be defective — contact the seller for an exchange under warranty.
Can the cylinder on a high-end ergonomic office chair be replaced?
Yes, in most cases. High-end ergonomic chairs often use specific or custom cylinders. Consult the manufacturer or after-sales service to obtain the original replacement part, especially if the chair is still under warranty.
Replacing your office chair cylinder is a simple, quick, and affordable repair that anyone can carry out at home. In less than 15 minutes and for just a few dollars, you give your seat a completely new life rather than throwing it away. A great way to combine budget control with responsible behaviour — at a time when France is looking to reduce the 250,000 tonnes of office furniture discarded every year.
Need a new chair after all? Discover the range of Kwesk professional office chairs to find a durable model built to last.